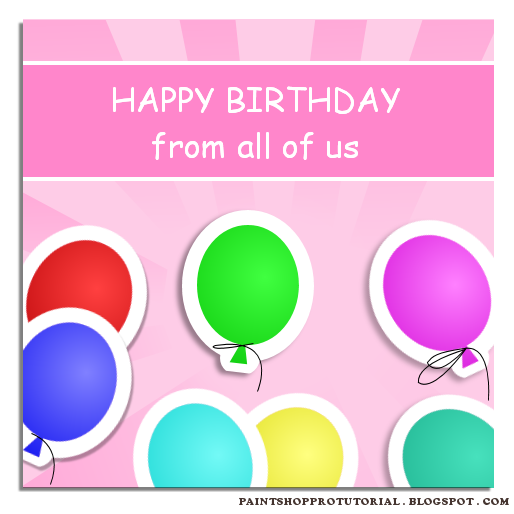
- Learn Paint Shop Pro by making happy birthday card
- Tutorial is written for Paint Shop Pro X2 ...

- Start a new image with white background 500 x 500 (ctrl + N)
- Create new layer PinkSquare -> make a selection and fill with #fecce7, also at the toolmenu choose Selections -> Load/Save Selections -> Save Selection To Alpha Channel -> named PinkSquareSelection
- ctrl + D to deselect, create new layer InLine1
- Choose Linear Gradient (invert) Background Foreground (fg_#ffabd8 bg_#fec8e5 angel_0 ) -> choose free hand selection_point to point -> make a selection like below and fill the color
- Keep making line until you have like below, the color is the same but you change the angel so that the dark color stay outside and the light color near the center
- Create new layer named InLine2 and make the rest of the line (remember to change the angel accordingly)
- At the toolmenu choose Selections -> Load/Save Selections -> Load Selection From Alpha Channel -> load PinkSquareSelection -> ctrl + shift + I to revert the selection
- Choose layer InLine1 -> press delete -> then do the same to layer InLine2
- Choose tool selection type_ellipse feather_30 then make a selection
- Choose layer InLine1 -> press Delete -> then do the same to layer InLine2
- Change opacity of layer InLine2 to 26
- Create new layer WhiteBg -> make a selection -> fill with #ffffff
- Create new layer PinkBg -> make a selection -> fill with #ff86cb
- Press T to add text, I use setting font_ComicSanMS size_12
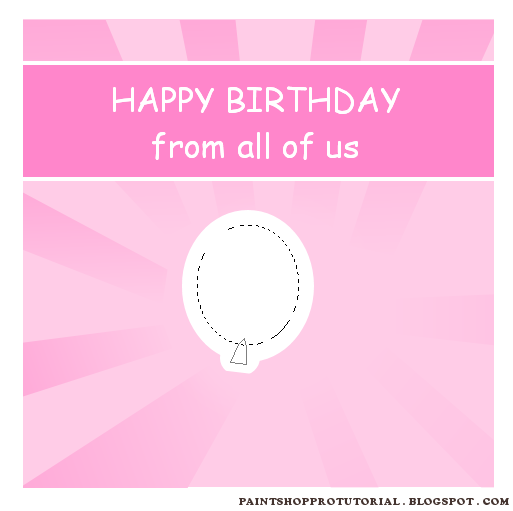
- Now its the fun part, let's make balloon ! First of all, choose tool selection_ellipse and draw a selection like this
- Hold shift and draw another selection
- Hold ctrl and draw another selection like this
- Now create a layer WhiteBalloonBG and fill with white color of course #ffffff
- Create a selection below

- Hold shift and draw another selection

- Create a new layer InBalloonBG and fill with Sunburst Gradient Background Foreground (fg_##28e627 bg_##3dfc3d )
- Choose layer WhiteBalloonBG -> use tool selection -> ctrl + A -> left click on image -> ctrl + shift + F
- Create new layer BalloonDrop -> At the topmenu choose -> Effects -> Drop Shadow vertical_-1 horizontal_1 opacity_60 blur_3 color_black -> ctrl + D
- So this is all the layers of your balloon
- Choose the WhiteBalloonBG -> at the topmenu choose Layer -> New Layer Group -> named Balloon1 -> left click and hold another layer to move in group
- Right click on the group Balloon1 -> Duplicate -> change new group name to Balloon2 -> press M -> left click hold at the balloon then move it to different area of the map
- Press ctrl + R to rotate (make sure you are selecting new whole group not only 1 layer) direction_right degrees_free_20 uncheck_alllayer and other option.
- As you can see the group Balloon2 go outside the pink border. At the toolmenu choose Selections -> Load/Save Selections -> Load Selection From Alpha Channel -> load PinkSquareSelection -> choose each layer of the group Balloon2 and press Delete
- Now finish this balloon by yourself, and use duplicate to make all other balloons. Just remember be careful about the position of each group because it affect which layer appear on top.
- Use Pen Tool to draw black line near the balloon (click here to learn how to use this tool)
- If you want the line to be thicker, right click on the layer -> property -> change setting to 1.5
- After every part, right click on vector -> covert to raster layer
- Create new layer MainDrop
- At the toolmenu choose Selections -> Load/Save Selections -> Load Selection From Alpha Channel -> load PinkSquareSelection
- At the topmenu choose -> Effects -> Drop Shadow vertical_4 horizontal_4 opacity_50 blur_3 color_black -> ctrl + D


